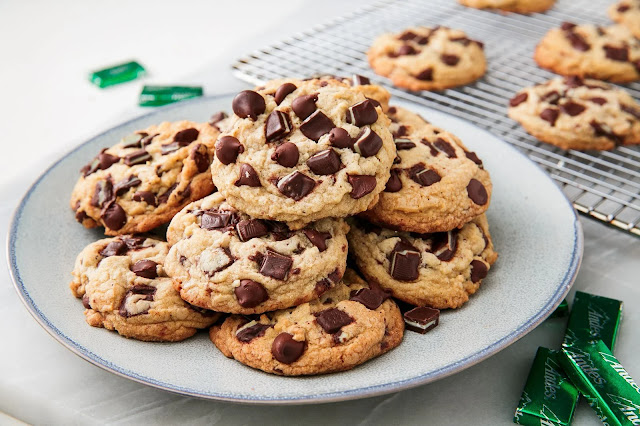
Chocolate chip cookies are a timeless classic, loved by people of all ages around the world. Whether you're a seasoned baker or a novice in the kitchen, mastering the art of baking these delectable treats is sure to bring joy to your taste buds and those of your loved ones. In this article, we'll take you through a step-by-step guide on how to create the perfect chocolate chip cookies right in your own home.
How to Make Chocolate Chip Cookies:
To begin making chocolate chip cookies, gather all your ingredients and equipment. You'll need unsalted butter, granulated sugar, brown sugar, eggs, vanilla extract, all-purpose flour, baking soda, salt, and semisweet chocolate chips. You'll also need mixing bowls, a mixer or a sturdy spoon for mixing, measuring cups and spoons, baking sheets, and parchment paper or non-stick spray.
Start by preheating your oven to 350°F (175°C). Line your baking sheets with parchment paper or lightly grease them to prevent the cookies from sticking.
In a large mixing bowl, cream together softened butter, granulated sugar, and brown sugar until the mixture is light and fluffy. This step helps incorporate air into the dough, resulting in a softer, chewier texture for your cookies.
Next, add the eggs to the butter and sugar mixture one at a time, beating well after each addition. Then, stir in the vanilla extract for added flavor.
Whisk together the all-purpose flour, baking soda, and salt in a separate bowl. This step ensures that the leavening agents (baking soda) and salt are evenly distributed throughout the flour, which will help the cookies rise evenly and add flavor. Add the wet and dry ingredients gradually, mixing just until incorporated. Avoid overmixing the dough as this may lead to difficult cookies. The dough should be thick and slightly sticky.
Now it's time to add the star ingredient: the chocolate chips! Once the semisweet chocolate chips are well mixed into the dough, fold them in. You can also add nuts or other mix-ins at this stage if you like. Drop rounded portions of dough, about 2 inches apart, onto the prepared baking sheets using a spoon or cookie scoop. This gives the cookies space to spread out during baking. For 9 to 11 minutes, or until the sides are just beginning to turn golden brown, bake the cookies in the preheated oven. The centers of the cookies will continue to set as they cool, even if they may still appear somewhat undercooked. After baking, take the cookies out of the oven and allow them to cool. This helps prevent them from breaking apart as they're still soft when they first come out of the oven.
Finally, enjoy your homemade chocolate chip cookies with milk or your favorite beverage! They're perfect for snacking, sharing with friends and family, or even gifting to loved ones.
How long do chocolate chip cookies take to bake?
The baking time for chocolate chip cookies typically ranges from 9 to 11 minutes at 350°F (175°C). However, the exact time may vary depending on your oven, the size of the cookies, and your desired level of doneness. While the cookies are baked, keep an eye on them. When the edges start to turn a light golden brown, they are done.
The centers may still look slightly undercooked, but they will continue to set as they cool on the baking sheets. If you prefer softer, chewier cookies, aim for the shorter end of the baking time. For crispier cookies, you can bake them for a couple of minutes longer. Just be cautious not to overbake them, as this can result in dry and tough cookies.
Once baked, allow the cookies to cool on the baking sheets for a few minutes before transferring them to wire racks to cool completely. This helps prevent them from breaking apart as they're still soft when they first come out of the oven.
What Is the Shelf Life of Chocolate Chip Cookies?
Chocolate chip cookies can typically last for about 3 to 5 days when stored properly at room temperature in an airtight container or sealed plastic bag. However, their shelf life may vary depending on factors such as ingredients used, baking technique, and environmental conditions.
To extend the freshness of your chocolate chip cookies, you can also store them in the refrigerator, which can prolong their shelf life to about 1 to 2 weeks. Just make sure to let them come to room temperature before serving to regain their optimal texture and flavor.
Alternatively, you can freeze chocolate chip cookies for longer-term storage. When stored in an airtight container or freezer bag, they can last for up to 3 months in the freezer. To enjoy them, simply thaw them at room temperature or reheat them in the oven for a few minutes before serving.
Keep in mind that the quality of the cookies may decline over time, so it's best to enjoy them fresh whenever possible. Additionally, cookies with perishable ingredients like cream cheese or fresh fruit may have a shorter shelf life and should be consumed within a few days.
Can Chocolate Chip Cookies Be Freeze-Stored?
Yes, you can freeze chocolate chip cookies to extend their shelf life. Freezing is a great way to preserve cookies for longer-term storage, allowing you to enjoy them at a later time. Here's how to freeze chocolate chip cookies properly:
1. Allow the cookies to cool completely: Before freezing, make sure the cookies have cooled down to room temperature. This helps prevent condensation from forming inside the packaging, which can lead to soggy cookies.
2. Arrange the cookies in a single layer: Place the cooled cookies in a single layer on a baking sheet lined with parchment paper or wax paper. Make sure they are not touching each other to prevent them from sticking together.
3. Freeze the cookies: Place the baking sheet with the cookies in the freezer and let them freeze for about 1 to 2 hours, or until they are firm to the touch. This initial freezing step helps prevent the cookies from sticking together when stored in a container or freezer bag.
4. Transfer to a freezer-safe container or bag: Once the cookies are frozen solid, transfer them to a freezer-safe container or resealable freezer bag. Before securely closing the bag or container, take out as much air as you can. For convenience, write the freezing date on the bag or container.
5. Store in the freezer: Place the container or bag of frozen cookies in the freezer, where they can be stored for up to 3 months.
6. Thaw and enjoy: When you're ready to enjoy the cookies, simply remove them from the freezer and let them thaw at room temperature for about 30 minutes to 1 hour. Alternatively, you can reheat the cookies in the oven at a low temperature (about 300°F or 150°C) for a few minutes until they are warmed through.
By following these steps, you can freeze chocolate chip cookies effectively and enjoy them whenever you have a craving for a sweet treat.
Tips and Variations:
Tips:
1. Use quality ingredients: Opt for high-quality chocolate chips, butter, and vanilla extract for the best flavor in your cookies.
2. Measure accurately: Use measuring cups and spoons to ensure accurate measurements of ingredients, especially flour and baking soda, for consistent results.
3. Soften butter properly: Bring butter to room temperature before creaming it with sugar to achieve a smooth and fluffy texture in the dough.
4. Don't overmix the dough: Mix the ingredients until just combined to avoid developing too much gluten, which can result in tough cookies.
5. Chill the dough: For thicker cookies with a chewy texture, chill the dough in the refrigerator for at least 30 minutes before baking.
6. Use parchment paper: Line your baking sheets with parchment paper to prevent the cookies from sticking and ensure easy cleanup.
7. Watch the baking time: Keep an eye on the cookies while they bake and remove them from the oven when the edges are lightly golden brown for soft and chewy cookies.
8. Let cookies cool: Allow the cookies to cool on the baking sheets for a few minutes before transferring them to wire racks to cool completely and set.
Variations:
1. Double chocolate chip cookies: Add cocoa powder to the dough and use both semisweet chocolate chips and white chocolate chips for a rich and decadent treat.
2. Nutty chocolate chip cookies: Mix chopped nuts such as walnuts, pecans, or almonds into the dough for added crunch and flavor.
3. Oatmeal chocolate chip cookies: Add rolled oats to the dough for a hearty texture and slightly nutty flavor. You can also include raisins or dried cranberries for extra sweetness.
4. Peanut butter chocolate chip cookies: Incorporate creamy or crunchy peanut butter into the dough along with the chocolate chips for a delicious combination of flavors.
5. Mint chocolate chip cookies: Add peppermint extract to the dough and use mint chocolate chips for a refreshing twist on classic chocolate chip cookies.
6. Gluten-free chocolate chip cookies: Use gluten-free flour instead of all-purpose flour to make these cookies suitable for individuals with gluten sensitivities or preferences.
7. Vegan chocolate chip cookies: Substitute butter with coconut oil or vegan butter and use dairy-free chocolate chips to make vegan-friendly chocolate chip cookies.
8. Giant chocolate chip cookies: Make oversized cookies by scooping larger portions of dough onto the baking sheets. Adjust the baking time accordingly for larger cookies.
Feel free to experiment with these tips and variations to create your own unique and irresistible chocolate chip cookies!
Ingredients:
- 1 cup (2 sticks) unsalted butter, softened
- 3/4 cup granulated sugar
- 3/4 cup packed brown sugar
- 2 large eggs
- 1 teaspoon vanilla extract
- 2 1/4 cups all-purpose flour
- 1 teaspoon baking soda
- 1/2 teaspoon salt
- 2 cups semisweet chocolate chips
Instructions:
1. Preheat your oven to 350°F (175°C) and line baking sheets with parchment paper or lightly grease them.
2. Using a large mixing bowl, beat the brown sugar, granulated sugar, and softened butter until creamy and light.
3. Beat thoroughly after each addition of eggs, one at a time. Then, stir in the vanilla extract.
4. Combine the flour, baking soda, and salt in another basin.
5. Mixing until just incorporated, gradually add the dry ingredients to the wet components. Be careful not to overmix.
6. Gently fold the chocolate chips into the dough until they are evenly mixed throughout. 7. Place rounded portions of dough, about 2 inches apart, onto the baking sheets that have been prepped using a spoon or cookie scoop. 8. Bake for 9 to 11 minutes, or until the sides are just beginning to turn brown, in a preheated oven. The centers may still look slightly undercooked, but they will continue to set as they cool.
9. Let the cookies cool for a few minutes on the baking sheets, then move them to wire racks to finish cooling.
10. Savor milk or your favorite beverage with your handmade chocolate chip cookies!
Feel free to adjust the recipe according to your preferences, such as using different types of chocolate chips or adding nuts. Happy baking!


